
You are looking for information, articles, knowledge about the topic nail salons open on sunday near me 라즈베리 파이 핀맵 on Google, you do not find the information you need! Here are the best content compiled and compiled by the https://toplist.maxfit.vn team, along with other related topics such as: 라즈베리 파이 핀맵 라즈베리파이4 핀맵, 라즈베리 파이 RuntimeError, 라즈베리파이 gpio 핀, 라즈베리파이 gpio 제어, GPIO 핀, 라즈베리파이 i2c, Raspberry Pi 4B pin map, 라즈베리파이 gpio 파이썬
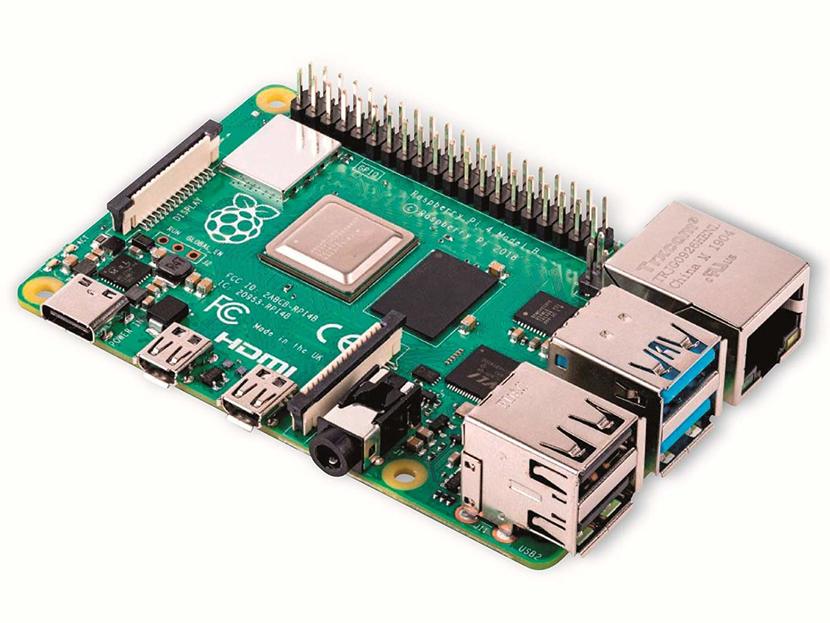
라즈베리파이4, 3 핀맵 , 데이터시트
- Article author: sj0020.tistory.com
- Reviews from users: 9164
 Ratings
 - Top rated: 4.2
- Lowest rated: 1
- Summary of article content: Articles about 라즈베리파이4, 3 핀맵 , 데이터시트 라즈베리파이4, 3 핀맵 , 데이터시트. 임베디드/RaspberryPi. 라즈베리파이4, 3 핀맵 , 데이터시트. sj0020 2020. 10. 23. 12:20. 4. bcm2711-peripherals.pdf. 1.26MB. …
- Most searched keywords: Whether you are looking for 라즈베리파이4, 3 핀맵 , 데이터시트 라즈베리파이4, 3 핀맵 , 데이터시트. 임베디드/RaspberryPi. 라즈베리파이4, 3 핀맵 , 데이터시트. sj0020 2020. 10. 23. 12:20. 4. bcm2711-peripherals.pdf. 1.26MB. 4 3
- Table of Contents:
관련글
댓글0
공지사항
최근글
인기글
최근댓글
태그
전체 방문자
티스토리툴바

Raspberry Pi GPIO Pinout
- Article author: pinout.xyz
- Reviews from users: 46007 Ratings
- Top rated: 4.2
- Lowest rated: 1
- Summary of article content: Articles about Raspberry Pi GPIO Pinout Pinout depicts pin 1 in the top left corner. Pin 1 is the only pin with a square solder pad, which may only be visible from the underse of your Pi. If you … …
- Most searched keywords: Whether you are looking for Raspberry Pi GPIO Pinout Pinout depicts pin 1 in the top left corner. Pin 1 is the only pin with a square solder pad, which may only be visible from the underse of your Pi. If you … The comprehensive add-on boards & GPIO Pinout guide for the Raspberry Pi
- Table of Contents:
Legend
Support Pinoutxyz
pHAT Stack
Explore HATs & pHATs
What do these numbers mean
What’s the orientation of this pinout
Graphical Pinout
Raspberry Pi 2 & 3 í ë§¤í – Windows IoT | Microsoft Docs
- Article author: docs.microsoft.com
- Reviews from users: 4300 Ratings
- Top rated: 3.4
- Lowest rated: 1
- Summary of article content: Articles about Raspberry Pi 2 & 3 í ë§¤í – Windows IoT | Microsoft Docs GPIO 핀; 직렬 UART; I2C Bus; SPI Bus. Raspberry Pi 2 & 3 Pin Header. Raspberry Pi 2 및 Raspberry Pi 3용 하드웨어 인터페이스는 보드의 40핀 … …
- Most searched keywords: Whether you are looking for Raspberry Pi 2 & 3 í ë§¤í – Windows IoT | Microsoft Docs GPIO 핀; 직렬 UART; I2C Bus; SPI Bus. Raspberry Pi 2 & 3 Pin Header. Raspberry Pi 2 및 Raspberry Pi 3용 하드웨어 인터페이스는 보드의 40핀 … Raspberry Pi 2 ë° 3ì í 매í 기ë¥ì ëí´ ììë´ ëë¤.windows iot, Rasperry Pi 2, Raspberry Pi 3, í 매í, GPIO
- Table of Contents:
GPIO í
ì§ë ¬ UART
I2C Bus
SPI Bus
라즈베리파이 GPIO 핀 번호, 사용 가능한 핀 정리
- Article author: fishpoint.tistory.com
- Reviews from users: 3883 Ratings
- Top rated: 3.8
- Lowest rated: 1
- Summary of article content: Articles about 라즈베리파이 GPIO 핀 번호, 사용 가능한 핀 정리 물론 특정한 기능이 정해진 핀도 GPIO 핀으로 할당해서 사용이 가능하지만 특별한 기능을 예약한다고 생각하면 나머지 마음대로 쓸 수 있는 핀의 개수는 … …
- Most searched keywords: Whether you are looking for 라즈베리파이 GPIO 핀 번호, 사용 가능한 핀 정리 물론 특정한 기능이 정해진 핀도 GPIO 핀으로 할당해서 사용이 가능하지만 특별한 기능을 예약한다고 생각하면 나머지 마음대로 쓸 수 있는 핀의 개수는 … 라즈베리파이 GPIO 핀 번호, 사용 가능한 핀 정리 라즈베리파이에서 실제 GPIO(General Purpose Input/Output) pin 으로 사용할 수 있는 핀을 계산해보자. GPIO 핀은 모든 마이크로 프로세서나 MCU, 온보드 컴퓨터..IoT, 라즈베리파이, 인공지능 개발자 블로그
- Table of Contents:
‘개발자라즈베리파이4’ Related Articles
티스토리툴바

Raspberry Pi 4 GPIO Pinout
- Article author: linuxhint.com
- Reviews from users: 42735 Ratings
- Top rated: 4.6
- Lowest rated: 1
- Summary of article content: Articles about Raspberry Pi 4 GPIO Pinout The Raspberry Pi sends data to a device via the Master Out Slave Pin (MOSI), and the same device communicates with the Raspberry Pi via the Master In Slave Out … …
- Most searched keywords: Whether you are looking for Raspberry Pi 4 GPIO Pinout The Raspberry Pi sends data to a device via the Master Out Slave Pin (MOSI), and the same device communicates with the Raspberry Pi via the Master In Slave Out … GPIO pins on Raspberry Pi is one of the ways to connect and monitor external devices with it. The Raspberry Pi 4 has 40 GPIO pins that can be easily configured to read inputs or write outputs. This article provides a detailed guide on Raspberry Pi general purpose input output pins (GPIO). A detailed table of pins are also provided in this guide.
- Table of Contents:
Raspberry Pi 4 GPIO Pins
GPIO Pins
Pulse Width Modulation
Serial Peripheral Interface Pins on Raspberry Pi 4
Inter Integrated Circuit Pins on Raspberry Pi 4
UART Pins on Raspberry Pi 4
Conclusion
[라즈베리파이] 라즈베리파이3 의 핀번호 (Pin map), GPIO :: 개발자를 위한 지침서
- Article author: i5i5.tistory.com
- Reviews from users: 40421 Ratings
- Top rated: 4.3
- Lowest rated: 1
- Summary of article content: Articles about [라즈베리파이] 라즈베리파이3 의 핀번호 (Pin map), GPIO :: 개발자를 위한 지침서 라즈베리파이3 핀번호. 아래의 [그림1. 물리적 핀번호. (Physical pins)] 와, [그림 2. GPIO 핀번호. (GPIO pins)] 를 보자. 물리적 핀번호와, … …
- Most searched keywords: Whether you are looking for [라즈베리파이] 라즈베리파이3 의 핀번호 (Pin map), GPIO :: 개발자를 위한 지침서 라즈베리파이3 핀번호. 아래의 [그림1. 물리적 핀번호. (Physical pins)] 와, [그림 2. GPIO 핀번호. (GPIO pins)] 를 보자. 물리적 핀번호와, … 라즈베리파이3 핀번호 아래의 [그림1. 물리적 핀번호. (Physical pins)] 와, [그림 2. GPIO 핀번호. (GPIO pins)] 를 보자. 물리적 핀번호와, GPIO 핀번호가 다르다는 것을 알 수 있다. 즉, GPIO 0과 GPIO 1은,..IT 개발자를 위한 블로그입니다.
- Table of Contents:
라즈베리파이3 핀번호
정리
전압
출력
입력
관련 명령어
인용참고자료
티스토리툴바
![[라즈베리파이] 라즈베리파이3 의 핀번호 (Pin map), GPIO :: 개발자를 위한 지침서](https://img1.daumcdn.net/thumb/R800x0/?scode=mtistory2&fname=https%3A%2F%2Fblog.kakaocdn.net%2Fdn%2F8P2FX%2FbtqDx5pALBs%2FLgjQPsu2XO63Jr95iIRqKk%2Fimg.png)
GPIO : Raspberry Pi 4 및 3의 연결에 관한 모든 것 | 무료 하드웨어
- Article author: www.hwlibre.com
- Reviews from users: 22974 Ratings
- Top rated: 4.1
- Lowest rated: 1
- Summary of article content: Articles about GPIO : Raspberry Pi 4 및 3의 연결에 관한 모든 것 | 무료 하드웨어 롯 Raspberry Pi 4 보드의 GPIO 핀, 3, 그리고 그 전임자들은 아두 이노가 가질 수있는 것과 유사한 기능을 SBC 보드에 제공합니다. …
- Most searched keywords: Whether you are looking for GPIO : Raspberry Pi 4 및 3의 연결에 관한 모든 것 | 무료 하드웨어 롯 Raspberry Pi 4 보드의 GPIO 핀, 3, 그리고 그 전임자들은 아두 이노가 가질 수있는 것과 유사한 기능을 SBC 보드에 제공합니다. Raspberry Pi 4 및 버전 3의 GPIO 연결은 이전 제품과 마찬가지로 SBC에 프로젝트를위한 Arduino와 유사한 기능을 제공합니다.
- Table of Contents:
GPIO 란 무엇입니까
Raspberry Pi의 GPIO 핀
GPIO에 무엇을 연결할 수 있습니까
Raspberry Pi에서 GPIO 사용 소개
See more articles in the same category here: 180+ tips for you.
Raspberry Pi GPIO Pinout
Pinout!
The Raspberry Pi GPIO pinout guide.
This GPIO Pinout is an interactive reference to the Raspberry Pi GPIO pins, and a guide to the Raspberry Pi’s GPIO interfaces. Pinout also includes dozens of pinouts for Raspberry Pi add-on boards, HATs and pHATs.
Support Pinout.xyz
If you love Pinout, please help me fund new features and improvements:
via GitHub at GitHub.com/sponsors/gadgetoid
via Patreon at Patreon.com/gadgetoid
Every $1 makes all the difference! Thank you.
pHAT Stack
Pinout has teamed up with Pimoroni to create a prototype board compatibility tool, check it out here!
Explore HATs & pHATs
Check out Pinout’s board explorer! Use it to find the pinout for your Raspberry Pi add-on board, or discover new boards. If you manufacture boards, we’d love to add yours too. You can contribute to Pinout.xyz at GitHub.com.
What do these numbers mean?
GPIO – General Purpose Input/Output, aka “BCM” or “Broadcom”. These are the big numbers, e.g. “GPIO 22”. You’ll use these with RPi.GPIO and GPIO Zero.
Physical – or “Board” correspond to the pin’s physical location on the header. These are the small numbers next to the header, e.g. “Physical Pin 15”.
WiringPi – for Gordon Henderson’s Wiring Pi library. These are shown as a tooltip when you mouseover a pin.
Rev 1 Pi – alternate GPIO/BCM numbers for the original, 26-pin model “A” and “B” Pi.
What’s the orientation of this pinout?
Pinout depicts pin 1 in the top left corner. Pin 1 is the only pin with a square solder pad, which may only be visible from the underside of your Pi. If you orient your Pi such that you are looking at the top with the GPIO on the right and HDMI port(s) on the left, your orientation will match Pinout.
Graphical Pinout
We’ve whipped up a simple graphical Raspberry Pi GPIO Pinout. Feel free to print, embed, share or hotlink this image and don’t forget to credit us!
Raspberry Pi 2 & 3 핀 매핑 – Windows IoT
목차
Raspberry Pi 2 & 3 핀 매핑
아티클
08/11/2022
읽는 데 7분 걸림
기여자 4명
이 문서의 내용
Raspberry Pi 2 및 Raspberry Pi 3용 하드웨어 인터페이스는 보드의 40핀 헤더 J8 을 통해 노출됩니다. 기능은 다음과 같습니다.
24x – GPIO 핀
– GPIO 핀 1x – 직렬 UART(RPi3에는 미니 UART만 포함)
– 직렬 UART(RPi3에는 미니 UART만 포함) 2x – SPI 버스
– SPI 버스 1x – I2C 버스
– I2C 버스 2x – 5V 전원 핀
– 5V 전원 핀 2x – 3.3V 전원 핀
– 3.3V 전원 핀 8x – 접지 핀
GPIO 핀
이 디바이스에서 사용할 수 있는 GPIO를 살펴보겠습니다.
GPIO 핀 개요
API를 통해 액세스할 수 있는 GPIO 핀은 다음과 같습니다.
GPIO # 전원 켜기 풀 대체 함수 머리글 핀 2 풀업 I2C1 SDA 3 3 풀업 I2C1 SCL 5 4 풀업 7 5 풀업 29 6 풀업 31 7 풀업 SPI0 CS1 26 8 풀업 SPI0 CS0 24 9 풀다운을 SPI0 MISO 21 10 풀다운을 SPI0 MOSI 19 11 풀다운을 SPI0 SCLK 23 12 풀다운을 32 13 풀다운을 33 16 풀다운을 SPI1 CS0 36 17 풀다운을 11 18 풀다운을 12 19 풀다운을 SPI1 MISO 35 20 풀다운을 SPI1 MOSI 38 21 풀다운을 SPI1 SCLK 40 22 풀다운을 15 23 풀다운을 16 24 풀다운을 18 25 풀다운을 22 26 풀다운을 37 27 풀다운을 13 35* 풀업 레드 파워 LED 47* 풀업 녹색 활동 LED
* = Raspberry Pi 2 전용. GPIO 35 & 47은 Raspberry Pi 3에서 사용할 수 없습니다.
GPIO 샘플
예를 들어 다음 코드는 GPIO 5 를 출력으로 열고 핀에 디지털 ‘1’을 씁니다.
using Windows.Devices.Gpio; public void GPIO() { // Get the default GPIO controller on the system GpioController gpio = GpioController.GetDefault(); if (gpio == null) return; // GPIO not available on this system // Open GPIO 5 using (GpioPin pin = gpio.OpenPin(5)) { // Latch HIGH value first. This ensures a default value when the pin is set as output pin.Write(GpioPinValue.High); // Set the IO direction as output pin.SetDriveMode(GpioPinDriveMode.Output); } // Close pin – will revert to its power-on state }
핀을 열면 끌어오기 저항기가 포함될 수 있는 전원 켜기 상태가 됩니다. 끌어오기 저항기의 연결을 끊고 높은 임피든스 입력을 가져오려면 드라이브 모드를 GpioPinDriveMode.Input으로 설정합니다.
pin.SetDriveMode(GpioPinDriveMode.Input);
핀이 닫혀 있으면 전원 켜기 상태로 되돌아갑니다.
핀 Muxing
일부 GPIO 핀은 여러 기능을 수행할 수 있습니다. 기본적으로 핀은 GPIO 입력으로 구성됩니다. 호출하거나 SpiDevice.FromIdAsync() 호출 I2cDevice.FromIdAsync() 하여 대체 함수를 열면 함수에 필요한 핀이 자동으로 올바른 함수로 전환됩니다(“muxed”). 디바이스를 호출하거나 SpiDevice.Dispose() 호출 I2cDevice.Dispose() 하여 닫으면 핀이 기본 함수로 되돌아갑니다. 서로 다른 두 함수에 핀을 한 번에 사용하려고 하면 충돌하는 함수를 열려고 할 때 예외가 throw됩니다. 예제:
var controller = GpioController.GetDefault(); var gpio2 = controller.OpenPin(2); // open GPIO2, shared with I2C1 SDA var dis = await DeviceInformation.FindAllAsync(I2cDevice.GetDeviceSelector()); var i2cDevice = await I2cDevice.FromIdAsync(dis[0].Id, new I2cConnectionSettings(0x55)); // exception thrown because GPIO2 is open gpio2.Dispose(); // close GPIO2 var i2cDevice = await I2cDevice.FromIdAsync(dis[0].Id, new I2cConnectionSettings(0x55)); // succeeds because gpio2 is now available var gpio2 = controller.OpenPin(2); // throws exception because GPIO2 is in use as SDA1 i2cDevice.Dispose(); // release I2C device var gpio2 = controller.OpenPin(2); // succeeds now that GPIO2 is available
직렬 UART
RPi2/3에서 사용할 수 있는 직렬 UART가 하나 있습니다. UART0
핀 8 – UART0 TX
핀 10 – UART0 RX
아래 예제에서는 UART0 을 초기화하고 쓰기를 수행한 다음 읽기를 수행합니다.
using Windows.Storage.Streams; using Windows.Devices.Enumeration; using Windows.Devices.SerialCommunication; public async void Serial() { string aqs = SerialDevice.GetDeviceSelector(“UART0”); /* Find the selector string for the serial device */ var dis = await DeviceInformation.FindAllAsync(aqs); /* Find the serial device with our selector string */ SerialDevice SerialPort = await SerialDevice.FromIdAsync(dis[0].Id); /* Create an serial device with our selected device */ /* Configure serial settings */ SerialPort.WriteTimeout = TimeSpan.FromMilliseconds(1000); SerialPort.ReadTimeout = TimeSpan.FromMilliseconds(1000); SerialPort.BaudRate = 9600; /* mini UART: only standard baudrates */ SerialPort.Parity = SerialParity.None; /* mini UART: no parities */ SerialPort.StopBits = SerialStopBitCount.One; /* mini UART: 1 stop bit */ SerialPort.DataBits = 8; /* Write a string out over serial */ string txBuffer = “Hello Serial”; DataWriter dataWriter = new DataWriter(); dataWriter.WriteString(txBuffer); uint bytesWritten = await SerialPort.OutputStream.WriteAsync(dataWriter.DetachBuffer()); /* Read data in from the serial port */ const uint maxReadLength = 1024; DataReader dataReader = new DataReader(SerialPort.InputStream); uint bytesToRead = await dataReader.LoadAsync(maxReadLength); string rxBuffer = dataReader.ReadString(bytesToRead); }
직렬 UART 코드를 실행하려면 UWP 프로젝트의 Package.appxmanifest 파일에 다음 기능을 추가해야 합니다.
Visual Studio 2017에는 직렬 통신 기능에 영향을 주는 매니페스트 디자이너(appxmanifest 파일의 시각적 편집기)에 알려진 버그가 있습니다. appxmanifest가 serialcommunication 기능을 추가하는 경우 디자이너를 사용하여 appxmanifest를 수정하면 appxmanifest가 손상됩니다(Device xml 자식이 손실됨). appxmanifest를 마우스 오른쪽 단추로 클릭하고 상황에 맞는 메뉴에서 코드 보기를 선택하여 appxmanifest를 직접 편집하여 이 문제를 해결할 수 있습니다.
I2C Bus
이 디바이스에서 사용할 수 있는 I2C 버스를 살펴보겠습니다.
I2C 개요
핀 헤더에는 2줄 SDA 및 SCL이 있는 하나의 I2C 컨트롤러 I2C1이 노출됩니다. 1.8KΡ 내부 풀업 저항기는 이 버스용 보드에 이미 설치되어 있습니다.
신호 이름 머리글 고정 번호 Gpio 번호 SDA 3 2 SCL 5 3
아래 예제에서는 I2C1 을 초기화하고 주소 0x40 I2C 디바이스에 데이터를 씁니다.
using Windows.Devices.Enumeration; using Windows.Devices.I2c; public async void I2C() { // 0x40 is the I2C device address var settings = new I2cConnectionSettings(0x40); // FastMode = 400KHz settings.BusSpeed = I2cBusSpeed.FastMode; // Create an I2cDevice with the specified I2C settings var controller = await I2cController.GetDefaultAsync(); using (I2cDevice device = controller.GetDevice(settings)) { byte[] writeBuf = { 0x01, 0x02, 0x03, 0x04 }; device.Write(writeBuf); } }
SPI Bus
RPi2/3에는 두 개의 SPI 버스 컨트롤러를 사용할 수 있습니다.
SPI0
신호 이름 머리글 고정 번호 Gpio 번호 MOSI 19 10 미소 21 9 SCLK 23 11 CS0 24 8 CS1 26 7
SPI1
신호 이름 머리글 고정 번호 Gpio 번호 MOSI 38 20 미소 35 19 SCLK 40 21 CS0 36 16
SPI 샘플
칩 선택 0을 사용하여 버스 SPI0에서 SPI 쓰기를 수행하는 방법의 예는 다음과 같습니다.
라즈베리파이 GPIO 핀 번호, 사용 가능한 핀 정리
반응형
라즈베리파이 GPIO 핀 번호, 사용 가능한 핀 정리
라즈베리파이에서 실제 GPIO(General Purpose Input/Output) pin 으로 사용할 수 있는 핀을 계산해보자.
GPIO 핀은 모든 마이크로 프로세서나 MCU, 온보드 컴퓨터에서 제공하는 입출력 핀으로 입력으로 사용하든가, 출력으로 사용하든가, 인터럽트 핀으로 사용할 때는 풀업, 풀다운 지정이 가능하고 신호가 올라갈 때, 떨어질 때, 레벨 유지할 때 인터럽트를 발생시키는 것까지 입 출력 핀을 마음대로 설정하여 사용할 수 있도록 사용자에게 제공되는 핀이다.
라즈베리파이 40Pin GPIO 핀을 분석하면
5V 출력이 2개, 3.3V 출력이 2개, GND 가 8개로 총 12개가 전원용이므로 사용하지 못한다.
GPIO 0과 GPIO 1인 ID_SD 핀가 ID_SC 핀이 예약되어 있어 사용하지 못한다.
GPIO 2, GPIO 3번 핀이 I2C 기능으로 사용 가능하다.
GPIO 14, GPIO 15 번 핀은 UART rx, tx 핀으로 사용 가능하다.
GPIO 10, 9, 11, 8 번은 SPI 인터페이스를 위해 사용가능하다.
물론 특정한 기능이 정해진 핀도 GPIO 핀으로 할당해서 사용이 가능하지만 특별한 기능을 예약한다고 생각하면 나머지 마음대로 쓸 수 있는 핀의 개수는 약 18개 정도가 된다.
핀을 할당하고 정리할 때는 아래 이미지를 출력하여 하나하나 할당하며 중복되지 않도록 정해야 한다.
라즈베리파이 GPIO 핀 번호
반응형
So you have finished reading the 라즈베리 파이 핀맵 topic article, if you find this article useful, please share it. Thank you very much. See more: 라즈베리파이4 핀맵, 라즈베리 파이 RuntimeError, 라즈베리파이 gpio 핀, 라즈베리파이 gpio 제어, GPIO 핀, 라즈베리파이 i2c, Raspberry Pi 4B pin map, 라즈베리파이 gpio 파이썬