
You are looking for information, articles, knowledge about the topic nail salons open on sunday near me 라즈베리 파이 4 카메라 on Google, you do not find the information you need! Here are the best content compiled and compiled by the Toplist.maxfit.vn team, along with other related topics such as: 라즈베리 파이 4 카메라 라즈베리파이 카메라 연결, 라즈베리파이 카메라 모듈, 라즈베리파이 카메라 opencv, 라즈베리파이 카메라 스트리밍
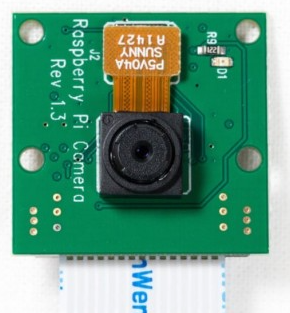
라즈베리파이 4B 카메라 키트(4GB+공식8M 카메라+32GB SD카드) : KIT 상품 > 라즈베리파이 > 오픈소스 하드웨어 존 > MCU보드/제어모듈
- Article author: www.icbanq.com
- Reviews from users: 35778
 Ratings
 - Top rated: 3.1
- Lowest rated: 1
- Summary of article content: Articles about 라즈베리파이 4B 카메라 키트(4GB+공식8M 카메라+32GB SD카드) : KIT 상품 > 라즈베리파이 > 오픈소스 하드웨어 존 > MCU보드/제어모듈 공식 정품 8M 카메라와 고급형 SD카드가 포함된 라즈베리파이4B 카메라 키트 입니다. – 모든 전자부품 뱅크! 국내 최대 전자부품 전문 쇼핑몰 – 아이씨뱅큐. …
- Most searched keywords: Whether you are looking for 라즈베리파이 4B 카메라 키트(4GB+공식8M 카메라+32GB SD카드) : KIT 상품 > 라즈베리파이 > 오픈소스 하드웨어 존 > MCU보드/제어모듈 공식 정품 8M 카메라와 고급형 SD카드가 포함된 라즈베리파이4B 카메라 키트 입니다. – 모든 전자부품 뱅크! 국내 최대 전자부품 전문 쇼핑몰 – 아이씨뱅큐. 공식 정품 8M 카메라와 고급형 SD카드가 포함된 라즈베리파이4B 카메라 키트 입니다. – 123700원 국내 최대 전자부품 전문 쇼핑몰 – 아이씨뱅큐라즈베리파이,라즈베리파이4,키트,세트,베이직,베이직키트,raspberrypi,raspberrypi4,라즈베리파이3,라즈베리파이3B+,카메라,고급형,SD카드,정품
- Table of Contents:
라즈베리파이 4B 카메라 키트(4GB+공식8M 카메라+32GB SD카드)
결제 및 주문
 Read More
라즈베리파이 카메라 모듈 사용하기 – 3DEMP
- Article author: www.3demp.com
- Reviews from users: 11239 Ratings
- Top rated: 4.3
- Lowest rated: 1
- Summary of article content: Articles about 라즈베리파이 카메라 모듈 사용하기 – 3DEMP 이번 포스팅에선 라즈베리파이 카메라에 대해 알아보도록 하겠습니다.사진 출처: https://www.raspberrypi.org/products/camera-module-v2/ 포스팅 … …
- Most searched keywords: Whether you are looking for 라즈베리파이 카메라 모듈 사용하기 – 3DEMP 이번 포스팅에선 라즈베리파이 카메라에 대해 알아보도록 하겠습니다.사진 출처: https://www.raspberrypi.org/products/camera-module-v2/ 포스팅 … 라즈베리파이,raspberrypie,라즈베리파이 카메라 모듈, 3demp, 쓰리디이엠피이번 포스팅에선 라즈베리파이 카메라에 대해 알아보도록 하겠습니다.사진 출처: https://www.raspberrypi.org/products/camera-module-v2/ 포스팅에서 쓰인 카메라는 카메라 모듈 v2입니다.사진출처: https://www.element14.com/community/docs/DOC-80899/l/raspberry-pi-3-model-b-technical-specifications 라즈베리파이를 보면 카메라 모듈을 연결할 수 있는 단자가 있습니다. CSI(Camera Serial Interface) 포트라고 하죠. 비슷하게 DSI(Display Serial Interface) 포트도 존재합니다. 이 포트는 라즈베리파이 디스플레이 연결할 때 쓰여요. 카메라 모듈을 사용하려면 라즈베리파이 CSI 포트에 카메라 모듈을 연결해야겠죠? 연결해 보겠습니다. * 연결하기에 앞서 주의사항 – 카메라 모듈 선의 양쪽 끝이 생각보다 날카롭습니다. 잘못하면 베일 것 같은 느낌? 조심해서 연결하면 좋겠습니다. – 카메라 모듈을 연결할 때에는 라즈베리파이의 전원 연결을 끊고 연결해 주세요.이곳에 카메라 모듈을 연결해 주면 됩니다. 연결부위를 자세히 보면 흰색과 검은색으로 나누어져 있는데표시한 검은색 부분을 살짝 들어올리면 올라갑니다. 왼쪽 오른쪽 각각 살짝 들어 올려주면 됩니다. 카메라 모듈의 끝을 보면 흰부분과 파란색 부분이 있는데 흰부분을 HDMI 단자 방향으로 하여 라즈베리파이에 연결해 줍니다. 넣으면 들어가는 느낌이 듭니다. 마지막에 딱 그 손맛이 있어요. 아 이걸 표현을 못하겠네. 아무튼 잘 끼워졌구나 하는 느낌이 듭니다. 연결 단자의 검은색 부분을 닫아서 카메라 모듈을 고정시켜 줍니다. 카메라 모듈을 살짝 당겨서 연결이 잘되어 있는지 확인해 주세요. 카메라 모듈 연결이 끝났으면, 라즈베리파이를 켜서 카메라 설정을 해줘야 합니다. 라즈베리파이 터미널에서 ~ $ sudo raspi-config 명령을 입력합니다. interfacing Options 항목을 선택합니다. Camera 항목을 선택합니다. <예>를 선택해 줍니다. 확인을 선택하면 raspi-config 초기 화면으로 돌아갑니다. Finish를 선택해줍니다. Finish를 선택하면 위와 같은 화면이 출력됩니다.라즈베리파이 카메라모듈 설정을 저장하기 위해 재시작합니다.이후 라즈베리파이가 다시 시작되면서 카메라 설정이 완료됩니다.위의 재시작 확인창이 뜨지 않는 경우 터미널에서 sudo reboot을 입력하여 직접 재시작 해주세요.카메라 설정이 완료되었으니 카메라 모듈을 사용해 봅시다.터미널 창을 열고~$ raspistill -o test.jpg명령을 입력합니다.라즈베리파이 화면에 잠시동안 카메라 모듈로 찍은 영상이 출력되다가,마지막 장면을 test.jpg 파일로 현재 디렉토리에 저장합니다.파일이름을 변경하지 않고, 같은 명령어를 다시 입력하면 이전 파일을 덮어쓰기 합니다.혹시라도 잘찍힌 사진이 날아가지 않게 조심해야겠네요.이번엔 사진을 몇초의 간격을 두고 찍어보겠습니다.~$ raspistill -o test.jpg -t 10000명령을 입력합니다.-t 명령어는 10초 후에 사진을 찍는다는 명령입니다.-t의 단위는 밀리초.아래는 카메라 모듈을 이용해 찍은 사진입니다. 찍긴 찍었는데… 사진이 뒤집어져 있습니다. 하지만 걱정마세요! 다 방법이 있죠. ~$ raspistill -vf -o test2.jpg 명령으로 다시 찍어줍니다. 사진이 똑바로 나오네요.-vf는 상하반전, -hf는 좌우반전 명령어입니다.그밖의 명령어에 대해 알고 싶다면 터미널에 ~$ raspistill명령을 입력하면 됩니다.이번에는 동영상을 찍어보겠습니다.~$ raspivid -o vid.h264명령을 입력해 줍니다.아까 사진찍는 명령어와 비슷합니다.raspistill에서 raspivid가 된 것이죠.기본 영상은 5초 정도 촬영합니다.마찬가지로 사용가능한 명령어를 확인하기 위해 ~$ raspivid명령을 입력하면 됩니다.* 포맷변경카메라 모듈로 영상을 촬영하면 동영상이 .h264 파일로 저장됩니다.이 파일은 우리가 보통 사용하는 동영상 플레이어(곰플레이어 등)에서 재생이 되지 않으므로, MP4 파일로 바꿔주어야 합니다. ~$ sudo apt-get install -y gpac 명령어를 입력합니다. -y 옵션은 설치 중 [yes/no] 질문에 대해 모두 yes로 답하게 하는 옵션입니다. 설치가 완료되면 .h264 파일을 .mp4 파일로 인코딩해 주어야겠죠? ~$ MP4Box -add vid3.h264 vid3.mp4명령을 입력합니다.카메라 모듈로 찍은 동영상이 재생됩니다!이번엔 파이썬 코드를 이용해서 카메라 모듈을 동작시켜 보겠습니다.파이썬 코드를 작성하기 위해 nano 편집기를 실행합니다. ~$ sudo nano camera.py 위의 명령어를 입력해 줍니다. * 파일 이름을 지을 때 picamera.py로 지으면 에러가 날 수 있습니다. 아래에 이유가 나오지만 import할 모듈 이름이 picamera이기 때문!! nano 편집기를 실행하여 위의 코드를 입력한 후 Ctrl + X, Y, Enter를 차례대로 입력해 줍니다. 소스코드 ——————————————————— from picamera import PiCamera from time import sleep camera = PiCamera() camera.start_preview() sleep(5) camera.capture(‘/home/pi/capture.jpg’) camera.stop_preview() ——————————————————— 위 코드에서 start_preview() 부분이 실행되면 모니터에 카메라 시점이 출력됩니다. sleep(5) 코드에 의해 5초 쉬고, (모니터에 카메라 시점이 출력되는 중) capture(‘/home/pi/capture.jpg’) 코드에 의해 괄호 안의 디렉토리에 capture.jpg라는 파일로 사진이 저장됩니다. stop_preview() 부분이 실행되면서 카메라가 시점이 종료됩니다. * sleep() 카메라 모듈에 capture() 명령을 주기 전에 sleep() 명령을 입력한 이유는, 카메라가 촬영을 하기 위해 약간의 준비시간이 필요하기 때문입니다. * import의 방법 import의 방법에는 크게 두가지 방식이 있는데 [import 모듈명] 방법과 [from 모듈명 import 메소드] 방법이 있습니다. 첫번째 방법은 모듈 전체를 불러오는 것이고, 두번째 방법은 모듈의 특정 부분만 불러오는 것입니다. 큰틀에서 보면 첫번째 방법이 두번째 방법 또한 포함하기 때문에 편해 보이지만, 사용방법이 살짝 다릅니다. 첫번째 방법으로 import를 하면 메소드를 사용할 때 모듈의 이름을 붙여주어야 하지만 두번째 방법으로 import를 하면 메소드의 이름만 사용하면 됩니다. 위의 코드를 예시로 들면 첫번째 방법일 때 camera = picamera.PiCamera() 두번째 방법일 때 camera = PiCamera() 어려운 듯 어렵지 않쥬? * 메소드? 간단하게 아두이노의 함수라고 생각하면 됩니다. 완전 동일한 개념은 아닙니다만… 쉽고 빠른 이해를 위해… 코드를 다 입력하고 저장했다면 이제 실행시켜 봅시다. ~$ sudo python camera.py 명령어를 입력합니다. 파이썬 파일이 실행되면서 카메라 모듈에 의해 사진이 찍혔습니다. 확인해 보겠습니다. 사진이 거꾸로 찍혔네요. 코드를 조금 수정해 봅시다. 소스코드 ——————————————————— from picamera import PiCamera from time import sleep camera = PiCamera() camera.start_preview() sleep(5) camera.rotation = 180 camera.capture(‘/home/pi/capture.jpg’) camera.stop_preview() ——————————————————– camera.rotation = 180 코드는 카메라 시점을 회전시켜주는 코드입니다. 180은 180도 회전이라는 뜻입니다. 다시 출력결과를 확인해 보겠습니다. 이번에는 제대로 찍혔네요. 다음은 파이썬 코드를 이용해 동영상을 찍어보겠습니다. nano 편집기를 실행해 줍니다. ~$ sudo nano camera.py 위와 같이 소스코드를 작성해 줍니다. 소스코드 ——————————————————— from picamera import PiCamera from time import sleep camera = PiCamera() camera.start_preview() sleep(2) camera.start_recording(‘/home/pi/vid.h264’) sleep(10) camera.stop_recording() camera.stop_preview() ——————————————————— start_recording, stop_recording 부분을 이용해서 영상의 시작과 끝을 지정합니다. 그사이에 있는 sleep(10)은 영상이 찍히는 시간이 되겠네요. 위 코드로 찍히는 영상은 10초짜리 영상입니다. 영상이 잘 찍혔는지 확인을 해봐야겠죠? ~$ omxplayer vid.h264 명령어를 입력해 줍니다. 영상이 잘 찍혔다는 것을 확인할 수 있습니다.
- Table of Contents:
3DEMP MAKER KIT
3DEMP 활동
STUDY
PROJECT
자료실
라즈베리파이 카메라 모듈 사용하기

라즈베리파이 카메라 사양과 사용방법 :: 남보공방
- Article author: makernambo.com
- Reviews from users: 28220 Ratings
- Top rated: 3.9
- Lowest rated: 1
- Summary of article content: Articles about 라즈베리파이 카메라 사양과 사용방법 :: 남보공방 라즈베리파이 카메라 사양과 사용방법 · 1) 카메라 모듈 연결. 위그림과 같이 보드의 카메라 아답터 검정색부분을 살짝 밀어 올려 틈을 벌린 후 케이블을 … …
- Most searched keywords: Whether you are looking for 라즈베리파이 카메라 사양과 사용방법 :: 남보공방 라즈베리파이 카메라 사양과 사용방법 · 1) 카메라 모듈 연결. 위그림과 같이 보드의 카메라 아답터 검정색부분을 살짝 밀어 올려 틈을 벌린 후 케이블을 … 1.라즈베리파이 카메라 라즈베리파이 전용 카메라는 2013년도에 500만 pixel용 V1이 출시된 이후 2016년도에는 800만 pixel용 V2이 출시되었고 2020년도에는 1200만 pixel용 High Quality Camera가 출시되었..메이킹,피지컬컴퓨팅,IOT,아두이노,ESP
- Table of Contents:
라즈베리파이 카메라 사양과 사용방법
티스토리툴바
파이 카메라 사용하기 · 세종대 라즈베리 파이 교육
- Article author: neosarchizo.gitbooks.io
- Reviews from users: 5922 Ratings
- Top rated: 3.9
- Lowest rated: 1
- Summary of article content: Articles about 파이 카메라 사용하기 · 세종대 라즈베리 파이 교육 파이 카메라 활성화 · 터미널을 열고 다음을 입력한다. sudo raspi-config · Enable Camera를 선택한다. · Enable을 선택한다. · Finish를 선택한다. · 예를 선택한다. …
- Most searched keywords: Whether you are looking for 파이 카메라 사용하기 · 세종대 라즈베리 파이 교육 파이 카메라 활성화 · 터미널을 열고 다음을 입력한다. sudo raspi-config · Enable Camera를 선택한다. · Enable을 선택한다. · Finish를 선택한다. · 예를 선택한다.
- Table of Contents:
파이 카메라 연결하기
파이 카메라 활성화
사진
비디오
라즈베리 파이 4 카메라
- Article author: kocoafab.cc
- Reviews from users: 2462 Ratings
- Top rated: 4.2
- Lowest rated: 1
- Summary of article content: Articles about 라즈베리 파이 4 카메라 라즈베리 파이에서 카메라 사용하기 · 1. 우선 라즈베리 파이를 최신 버전으로 업그레이드 해줍니다. sudo apt-get update sudo apt-get upgrade · 2. …
- Most searched keywords: Whether you are looking for 라즈베리 파이 4 카메라 라즈베리 파이에서 카메라 사용하기 · 1. 우선 라즈베리 파이를 최신 버전으로 업그레이드 해줍니다. sudo apt-get update sudo apt-get upgrade · 2.
- Table of Contents:
라즈베리 파이 4 카메라 – 검색결과 | 쇼핑하우
- Article author: m.shoppinghow.kakao.com
- Reviews from users: 32237 Ratings
- Top rated: 3.0
- Lowest rated: 1
- Summary of article content: Articles about 라즈베리 파이 4 카메라 – 검색결과 | 쇼핑하우 쇼핑하우. 쇼핑 사이드 메뉴 펼치기. 검색어 입력폼. 검색. 쇼핑하우 메뉴. loading.. 검색결과. 검색필터. 필터 전체보기. 숏컷필터. 무료배송; 할인쿠폰 … …
- Most searched keywords: Whether you are looking for 라즈베리 파이 4 카메라 – 검색결과 | 쇼핑하우 쇼핑하우. 쇼핑 사이드 메뉴 펼치기. 검색어 입력폼. 검색. 쇼핑하우 메뉴. loading.. 검색결과. 검색필터. 필터 전체보기. 숏컷필터. 무료배송; 할인쿠폰 …
- Table of Contents:

Raspberry Pi Documentation – Camera
- Article author: www.raspberrypi.com
- Reviews from users: 42648 Ratings
- Top rated: 4.3
- Lowest rated: 1
- Summary of article content: Articles about Raspberry Pi Documentation – Camera Raspberry Pi’s implementation of libcamera supports not only the three standard Raspberry Pi cameras (the OV5647 or V1 camera, the IMX219 or V2 camera and the … …
- Most searched keywords: Whether you are looking for Raspberry Pi Documentation – Camera Raspberry Pi’s implementation of libcamera supports not only the three standard Raspberry Pi cameras (the OV5647 or V1 camera, the IMX219 or V2 camera and the … The official documentation for Raspberry Pi computers and microcontrollers
- Table of Contents:
Accessories
Introducing the Raspberry Pi Cameras
Camera Modules
libcamera and libcamera-apps
Raspicam commands
Application Notes
V4L2 Drivers
Camera Serial Interface 2 (CSI2) Unicam

라즈베리파이 카메라 사용법(1) – 설치와 셋업하기 – Geek’s Voyage
- Article author: geeksvoyage.com
- Reviews from users: 44590 Ratings
- Top rated: 4.4
- Lowest rated: 1
- Summary of article content: Articles about 라즈베리파이 카메라 사용법(1) – 설치와 셋업하기 – Geek’s Voyage 파이썬 라이브러리(picamera)로 촬영하기. 카메라 사용법 관련 글은 라즈베리파이 재단에서 공식 출시한 카메라 모듈 V2(Raspberry Pi Camera Module V2) … …
- Most searched keywords: Whether you are looking for 라즈베리파이 카메라 사용법(1) – 설치와 셋업하기 – Geek’s Voyage 파이썬 라이브러리(picamera)로 촬영하기. 카메라 사용법 관련 글은 라즈베리파이 재단에서 공식 출시한 카메라 모듈 V2(Raspberry Pi Camera Module V2) … 라즈베리파이 공식 카메라 모듈인 Camera Module V2의 사용법. 첫번째 단계, 카메라 설치와 셋업하기
- Table of Contents:
1 라즈베리파이 카메라 설치
2 카메라모듈 인터페이스 설정
라즈베리파이4 B 설치가이드(20) 기기 이름(hostname) 설정하기
라즈베리파이4 B 설치가이드(19) fail2ban 설치하기
라즈베리파이4 B 설치가이드(18) swap 사이즈 설정
라즈베리파이4 B 설치가이드(17) cron 설정하기(예약 작업)

See more articles in the same category here: toplist.maxfit.vn/blog.
라즈베리파이 카메라 사양과 사용방법
1.라즈베리파이 카메라
라즈베리파이 전용 카메라는 2013년도에 500만 pixel용 V1이 출시된 이후 2016년도에는 800만 pixel용 V2이 출시되었고 2020년도에는 1200만 pixel용 High Quality Camera가 출시되었다. V1과 V2는 동일한 사이즈의 소형 카메라 모듈 형태이지만 High Quality Cameras는 비교적 큰사이즈로 렌즈교환이 가능한 형태이다.
2.라즈베리파이 카메라 사양
Model Raspberry pi camera V1 Raspberry pi camera V2 Raspberry pi camera HQ Photo Net price $25 $25 $50 Size Around 25 × 24 × 9 mm Around 25 × 24 × 9 mm 38 x 38 x 18.4mm (excluding lens) Weight 3g 3g Still resolution 5 Megapixels 8 Megapixels 12.3 Megapixels Video modes 1080p30, 720p60 and 640 × 480p60/90 1080p30, 720p60 and 640 × 480p60/90 1080p30, 720p60 and 640 × 480p60/90 Linux integration V4L2 driver available V4L2 driver available V4L2 driver available C programming API OpenMAX IL and others available OpenMAX IL and others available Sensor OmniVision OV5647 Sony IMX219 Sony IMX 477 Sensor resolution 2592 × 1944 pixels 3280 × 2464 pixels 4056 x 3040 pixels Sensor image area 3.76 × 2.74 mm 3.68 x 2.76 mm (4.6 mm diagonal) 6.287mm x 4.712 mm (7.9mm diagonal) Pixel size 1.4 µm × 1.4 µm 1.12 µm x 1.12 µm 1.55 µm x 1.55 µm Optical size 1/4″ 1/4″ Full-frame SLR lens equivalent 35 mm S/N ratio 36 dB Dynamic range 67 dB @ 8x gain Sensitivity 680 mV/lux-sec Dark current 16 mV/sec @ 60 C Well capacity 4.3 Ke- Fixed focus 1 m to infinity N/A Focal length 3.60 mm +/- 0.01 3.04 mm Depends on lens Horizontal field of view 53.50 +/- 0.13 degrees 62.2 degrees Depends on lens Vertical field of view 41.41 +/- 0.11 degrees 48.8 degrees Depends on lens Focal ratio (F-Stop) 2.9 2.0 Depends on lens
위 표에서는 버전 별로 25달러에서 50달러로 큰 가격차이가 없는 것처럼 보이지만, V1은 중국산 복제품이 많아 훨씬 싼 가격 (5달러 미만)에 구매할 수 있고, High Quality Camera는 렌즈를 별도로 구매해야 하므로 2배이상 비용이 소요된다.
그리고 구매시 주의해야 할 사항은 야간 촬영용으로 IR필터를 제거한 NOIR 버전도 함께 판매되므로 용도에 맞추어 선택해야 한다. 아래 사진의 왼쪽 녹색은 IR필터가 포함된 일반적인 촬영용이고 오른쪽 검정색은 야간에 적외선 불빛을 주어 야간촬영이 가능하도록 IR 필터를 제거한 NOIR 버전이다.
야간 촬영용으로 아래와 같이 NOIR 버전 카메라에 전용 적외선 조명장치까지 부착하여 판매되는 경우도 있다.
3.라즈베리파이 카메라 사용방법
1) 카메라 모듈 연결
위그림과 같이 보드의 카메라 아답터 검정색부분을 살짝 밀어 올려 틈을 벌린 후 케이블을 삽입한 후 다시 눌러 고정시켜 주면 된다.
2) 라즈베리파이 설정
라즈베리파이 데스크탑 메뉴에서 Preferences -> Raspberry Configuration을 선택하면 아래와 같이 환경설정화면이 표시되는데 2번째 탭에 있는 Camera를 Enable로 선택하고 Rebooting하면 된다.
만약 SSH등으로 원격접속하여 라즈베리파이 데스크탑 화면을 띄울 수 없는 경우라면 다음 명령어를 입력하여 텍스트버전 환경설정화면을 호출하여 작업할 수도 있다.
sudo raspi-config
3번째의 Interface Option을 선택한 후 표시되는 아래 화면에서 P1 Camera 메뉴를 선택한다
아래 화면이 표시될 때 yes를 선택하여 Enable시키면 된다.
3) 촬영방법 : 터미널창을 호출하여 다음 명령어를 입력해 주면 된다
– 정지화면(Stillcut) 촬영 : raspistill option
option에는 여러가지가 있으나 대표적인 것은 다음과 같다 .
-o file명 : 저장할 파일 명
예를 들어 raspistill -o test.png 라는 명령은 스틸컷 사진을 찍어 test.png라는 파일로 저장하라는 명령이다
-t 지연시간 : 지연시간 (밀리세컨드 단위) 이후에 촬영하라는 명령이다. ( 생략치는 2000미리세컨드 = 2초)
예) raspistill -t 5000 -o test.png라는 명령은 5초후에 촬영하여 test.png라는 파일로 저장하라는 명령
-w 가로크기 -h 세로크기 : 지정하는 가로 세로크기 사이즈로 촬영하라는 명령이다
예) raspistill -o aa.png -w 640 -h 400 : 가로 640px 세로 480px 사이즈로 촬영하여 aa.jpg 로 저장
– 동영상촬영 : raspivid option
option은 raspistill 과 비슷하나 Default size는 1920×1080 px 이다.
-t 시간 : 지정 시간 (밀리세컨드 단위)동안 촬영하라는 명령이다.
-f framerate : 지정하는 framerate 속도로 촬영
예 ) raspivid -t 10000 -o video.h264 -f 30 : 30 frame/sec 품질로 10초간 촬영하여 video.h264라는 file로 저장하라는 명령이다.
4. 문제해결 :
1) V1카메라는 작동되는데 V2 카메라가 안되는 경우 : 라즈베리파이 펌웨어가 V2 카메라 기능 이전일 경우가
있으므로 라즈베리파이 터미널창에서 다음 명령을 입력하여 라즈베리파이 펌웨어를 최신판으로 Update해 준다.
sudo apt-get-update
sudo apt-get-upgrade
2) 초점이 맞지 않는 경우 : 촬영대상이 너무 멀거나 너무 가까워서 흐릿하게 활영되거나, 구매 초기시에 부터 초점조절이 되어있지 않아 흐릿하게 나오는 경우가 있는데 카메라 렌즈를 돌려 초점을 미세조절할 수 있다.
카메라 구매시 박스안에는 위 사진과 같은 둥근 프라스틱이 있는데 이것이 초점 미세조정용 기구이다. 위 사진에서와 같이 이기구를 카메라렌즈 위에 끼워서 좌우로 조그씩 돌려가며 초점을 미세조절할 수 있다. 만약 이 기구가 없으면 아래와 같이 핀셋으로 잡고 돌려서 조정할 수도 있는데 핀셋끝으로 렌즈 표면을 긁지 않도록 조심해야 한다.
구매좌표 :
-해외직구
-국내 https://link.coupang.com/a/j8g8B
쿠팡 파트너스 활동의 일환으로, 이에 따른 일정액의 수수료를 제공받을 수 있습니다.
파이 카메라 사용하기 · 세종대 라즈베리 파이 교육
파이 카메라 사용하기
파이 카메라를 설정하고 터미널에서 사진과 영상을 찍는 방법을 배웁니다.
파이 카메라 연결하기
라즈베리 파이에 보면 다음과 같이 CAMERA라고 적힌 부분을 볼 수 있다.
파이 카메라 케이블의 면을 살펴보면 한 쪽은 필름에 덮여있고, 한 쪽은 금속면이 노출되어있다.
케이블의 금속면이 노출된 부분을 CAMERA 글자를 향하도록 한 상태에서 케이블에 꽂아준다.
파이 카메라 활성화
터미널을 열고 다음을 입력한다. sudo raspi-config Enable Camera를 선택한다.
Enable을 선택한다.
Finish를 선택한다.
예를 선택한다.
사진
기본 촬영
터미널에서 다음을 입력하면 미리보기 창이 뜨고 5초 뒤 사진이 찍힌다. raspistill -o cam.jpg 툴바 메뉴에서 File Manager 아이콘을 클릭한다.
cam.jpg를 더블 클릭한다.
실행하면 다음과 같이 찍은 사진을 볼 수 있다.
타이머 변경
타이머의 기본 값은 5초다. 옵션을 통해 타이머 시간을 바꿔본다. 타이머 시간을 바꾸는 옵션은 t이다. 단위는 밀리초(Millisecond)를 사용한다. 다음은 타이머 시간을 1초로 설정한 것이다.
raspistill -t 1000 -o cam.jpg
크기 변경
w와 h 옵션을 이용해 각각 넓이, 높이를 설정할 수 있다.
다음은 사진 크기를 넓이(w) 300, 높이(h) 300으로 설정한 것이다.
raspistill -w 300 -h 300 -o cam.jpg
밝기 조절
br 옵션을 이용해 사진의 밝기를 설정할 수 있다.
다음은 밝기를 0%, 50%, 100%로 설정한 것이다.
raspistill -br 0 -o br-0.jpg raspistill -br 50 -o br-50.jpg raspistill -br 100 -o br-100.jpg
화면 뒤집기
hf, vf 옵션을 이용해 사진을 수평 또는 수직으로 뒤집을 수 있다.
raspistill -hf cam.jpg
raspistill -vf cam.jpg
더 많은 옵션보기
raspistill의 더 다양한 옵션을 확인하고 싶다면 아래와 같이 입력하면 된다.
raspistill -?
Bash 스크립트 만들기
실행하면 자동으로 년, 월, 일, 시간으로 파일명을 정해 사진을 찍어주는 Bash 스크립트를 만들어본다.
먼저 홈 디렉토리로 이동한다. cd ~/ nano를 이용해 camera.sh라는 파일을 생성한다. nano camera.sh camera.sh에 다음과 같이 입력한 뒤 저장(Ctrl + o)하고 종료(Ctrl + x)한다. DATE=$(date + “%Y-%m-%d_%H%M” ) raspistill -o /home/pi/camera/ $DATE .jpg camera라는 폴더를 만든다. mkdir camera 다음을 실행해 camera.sh를 실행할 수 있도록 만든다. chmod +x camera.sh 다음과 같이 실행하면 camera 폴더에 시간으로 이름이 지어져 찍힌 사진을 볼 수 있다. ./camera.sh
비디오
기본 촬영
터미널에서 다음을 입력하면 미리보기 창이 뜨고 5초 동안 동영상을 찍는다. raspivid -o video.h264 omxplayer를 실행해 촬영한 동영상을 확인할 수 있다. omxplayer video.h264
길이 변경
동영상 기본 길이는 5초다. t 옵션을 통해 길이를 바꿀 수 있다. 단위는 밀리초(Millisecond)를 사용한다. 다음은 동영상 시간을 10초로 설정한 것이다.
raspivid -t 10000 -o video.h264
옵션 적용
raspivid의 옵션은 raspistill의 옵션과 거의 동일하다. 따라서 앞에서 raspistill에서 사용한 옵션을 그대로 사용하면 된다. 만약 raspivid의 다양한 옵션을 확인하고 싶다면 다음과 같이 입력한다.
Raspberry Pi Documentation
Sets burst capture mode. This prevents the camera from returning to preview mode in between captures, meaning that captures can be taken closer together.
The camera is run for the requested time ( -t ), and a capture can be initiated throughout that time by sending a USR1 signal to the camera process. This can be done using the kill command. You can find the camera process ID using the pgrep raspistill command.
The camera is run for the requested time ( -t ), and a capture can be initiated throughout that time by pressing the Enter key. Pressing X then Enter will exit the application before the timeout is reached. If the timeout is set to 0, the camera will run indefinitely until the user presses X then Enter. Using the verbose option ( -v ) will display a prompt asking for user input, otherwise no prompt is displayed.
This runs the preview window using the full resolution capture mode. Maximum frames per second in this mode is 15fps, and the preview will have the same field of view as the capture. Captures should happen more quickly, as no mode change should be required. This feature is currently under development.
Applies real-time EXIF information from any attached GPS dongle (using GSPD) to the image; requires libgps.so to be installed.
Setting –exif none will prevent any EXIF information being stored in the file. This reduces the file size slightly.
Note that a small subset of these tags will be set automatically by the camera system, but will be overridden by any EXIF options on the command line.
would set the longitude to 5 degs, 10 minutes, 15 seconds. See EXIF documentation for more details on the range of tags available; the supported tags are as follows:
Allows the insertion of specific EXIF tags into the JPEG image. You can have up to 32 EXIF tag entries. This is useful for tasks like adding GPS metadata. For example, to set the longitude:
Sets the JPEG restart marker interval to a specific value. Can be useful for lossy transport streams because it allows a broken JPEG file to still be partially displayed.
Valid options are jpg , bmp , gif , and png . Note that unaccelerated image types (GIF, PNG, BMP) will take much longer to save than jpg, which is hardware accelerated. Also note that the filename suffix is completely ignored when deciding the encoding of a file.
This options cycles through the range of camera options. No capture is taken, and the demo will end at the end of the timeout period, irrespective of whether all the options have been cycled. The time between cycles should be specified as a millisecond value.
if –thumb none is specified, no thumbnail information will be placed in the file. This reduces the file size slightly.
Allows specification of the thumbnail image inserted into the JPEG file. If not specified, defaults are a size of 64×48 at quality 35.
Instead of a simple frame number, the timelapse file names will use a single number which is the Unix timestamp, i.e. the seconds since 1970.
Instead of a simple frame number, the timelapse file names will use a date/time value of the format aabbccddee , where aa is the month, bb is the day of the month, cc is the hour, dd is the minute, and ee is the second.
Specifies the first frame number in the timelapse. Useful if you have already saved a number of frames, and want to start again at the next frame.
If a time-lapse value of 0 is entered, the application will take pictures as fast as possible. Note that there’s an minimum enforced pause of 30ms between captures to ensure that exposure calculations can be made.
Note that the %04d indicates a 4-digit number, with leading zeroes added to make the required number of digits. So, for example, %08d would result in an 8-digit number.
The specific value is the time between shots in milliseconds. Note that you should specify %04d at the point in the filename where you want a frame count number to appear. So, for example, the code below will produce a capture every 2 seconds, over a total period of 30s, named image0001.jpg , image0002.jpg and so on, through to image0015.jpg .
If set to 0, the preview will run indefinitely, until stopped with CTRL-C. In this case no capture is made.
The program will run for the specified length of time, entered in milliseconds. It then takes the capture and saves it if an output is specified. If a timeout value is not specified, then it is set to 5 seconds (-t 5000). Note that low values (less than 500ms, although it can depend on other settings) may not give enough time for the camera to start up and provide enough frames for the automatic algorithms like AWB and AGC to provide accurate results.
Makes a file system link under this name to the latest frame.
Specifies the output filename. If not specified, no file is saved. If the filename is ‘-‘, then all output is sent to stdout.
This option inserts the raw Bayer data from the camera into the JPEG metadata.
raspivid
Copy to Clipboard –width, -w Set image width
Width of resulting video. This should be between 64 and 1920.
Copy to Clipboard –height, -h Set image height
Height of resulting video. This should be between 64 and 1080.
Copy to Clipboard –bitrate, -b Set bitrate
Use bits per second, so 10Mbps would be -b 10000000 . For H264, 1080p30 a high quality bitrate would be 15Mbps or more. Maximum bitrate is 25Mbps ( -b 25000000 ), but much over 17Mbps won’t show noticeable improvement at 1080p30.
Copy to Clipboard –output, -o Output filename
Specify the output filename. If not specified, no file is saved. If the filename is ‘-‘, then all output is sent to stdout.
To connect to a remote IPv4 host, use tcp or udp followed by the required IP Address. e.g. tcp://192.168.1.2:1234 or udp://192.168.1.2:1234 .
To listen on a TCP port (IPv4) and wait for an incoming connection use –listen (-l) option, e.g. raspivid -l -o tcp://0.0.0.0:3333 will bind to all network interfaces, raspivid -l -o tcp://192.168.1.1:3333 will bind to a local IPv4.
Copy to Clipboard –listen, -l
When using a network connection as the data sink, this option will make the system wait for a connection from the remote system before sending data.
Copy to Clipboard –verbose, -v Output verbose information during run
Outputs debugging/information messages during the program run.
Copy to Clipboard –timeout, -t Time before the camera takes picture and shuts down
The total length of time that the program will run for. If not specified, the default is 5000ms (5 seconds). If set to 0, the application will run indefinitely until stopped with Ctrl-C.
Copy to Clipboard –demo, -d Run a demo mode
This options cycles through the range of camera options. No recording is done, and the demo will end at the end of the timeout period, irrespective of whether all the options have been cycled. The time between cycles should be specified as a millisecond value.
Copy to Clipboard –framerate, -fps Specify the frames per second to record
At present, the minimum frame rate allowed is 2fps, and the maximum is 30fps. This is likely to change in the future.
Copy to Clipboard –penc, -e Display preview image after encoding
Switch on an option to display the preview after compression. This will show any compression artefacts in the preview window. In normal operation, the preview will show the camera output prior to being compressed. This option is not guaranteed to work in future releases.
Copy to Clipboard –intra, -g Specify the intra refresh period (key frame rate/GoP)
Sets the intra refresh period (GoP) rate for the recorded video. H264 video uses a complete frame (I-frame) every intra refresh period, from which subsequent frames are based. This option specifies the number of frames between each I-frame. Larger numbers here will reduce the size of the resulting video, and smaller numbers make the stream less error-prone.
Copy to Clipboard –qp, -qp Set quantisation parameter
Sets the initial quantisation parameter for the stream. Varies from approximately 10 to 40, and will greatly affect the quality of the recording. Higher values reduce quality and decrease file size. Combine this setting with a bitrate of 0 to set a completely variable bitrate.
Copy to Clipboard –profile, -pf Specify H264 profile to use for encoding
Sets the H264 profile to be used for the encoding. Options are:
baseline
main
high
Copy to Clipboard –level, -lev
Specifies the H264 encoder level to use for encoding. Options are 4 , 4.1 , and 4.2 .
Copy to Clipboard –irefresh, -if
Sets the H264 intra-refresh type. Possible options are cyclic , adaptive , both , and cyclicrows .
Copy to Clipboard –inline, -ih Insert PPS, SPS headers
Forces the stream to include PPS and SPS headers on every I-frame. Needed for certain streaming cases e.g. Apple HLS. These headers are small, so don’t greatly increase the file size.
Copy to Clipboard –spstimings, -stm
Insert timing information into the SPS block.
Copy to Clipboard –timed, -td Do timed switches between capture and pause
This options allows the video capture to be paused and restarted at particular time intervals. Two values are required: the on time and the off time. On time is the amount of time the video is captured, and off time is the amount it is paused. The total time of the recording is defined by the timeout option. Note that the recording may take slightly over the timeout setting depending on the on and off times.
For example:
Copy to Clipboard raspivid -o test.h264 -t 25000 -timed 2500,5000
will record for a period of 25 seconds. The recording will be over a timeframe consisting of 2500ms (2.5s) segments with 5000ms (5s) gaps, repeating over the 20s. So the entire recording will actually be only 10s long, since 4 segments of 2.5s = 10s separated by 5s gaps. So:
2.5 record — 5 pause – 2.5 record — 5 pause – 2.5 record — 5 pause — 2.5 record
gives a total recording period of 25s, but only 10s of actual recorded footage.
Copy to Clipboard –keypress, -k Toggle between record and pause on Enter keypress
On each press of the Enter key, the recording will be paused or restarted. Pressing X then Enter will stop recording and close the application. Note that the timeout value will be used to signal the end of recording, but is only checked after each Enter keypress; so if the system is waiting for a keypress, even if the timeout has expired, it will still wait for the keypress before exiting.
Copy to Clipboard –signal, -s Toggle between record and pause according to SIGUSR1
Sending a USR1 signal to the raspivid process will toggle between recording and paused. This can be done using the kill command, as below. You can find the raspivid process ID using pgrep raspivid .
kill -USR1
Note that the timeout value will be used to indicate the end of recording, but is only checked after each receipt of the SIGUSR1 signal; so if the system is waiting for a signal, even if the timeout has expired, it will still wait for the signal before exiting.
Copy to Clipboard –split, -sp
When in a signal or keypress mode, each time recording is restarted, a new file is created.
Copy to Clipboard –circular, -c
Select circular buffer mode. All encoded data is stored in a circular buffer until a trigger is activated, then the buffer is saved.
Copy to Clipboard –vectors, -x
Turns on output of motion vectors from the H264 encoder to the specified file name.
Copy to Clipboard –flush, -fl
Forces a flush of output data buffers as soon as video data is written. This bypasses any OS caching of written data, and can decrease latency.
Copy to Clipboard –save-pts, -pts
Saves timestamp information to the specified file. Useful as an input file to mkvmerge .
Copy to Clipboard –codec, -cd
Specifies the encoder codec to use. Options are H264 and MJPEG . H264 can encode up to 1080p, whereas MJPEG can encode up to the sensor size, but at decreased framerates due to the higher processing and storage requirements.
Copy to Clipboard –initial, -i Define initial state on startup
Define whether the camera will start paused or will immediately start recording. Options are record or pause . Note that if you are using a simple timeout, and initial is set to pause , no output will be recorded.
Copy to Clipboard –segment, -sg Segment the stream into multiple files
Rather than creating a single file, the file is split into segments of approximately the number of milliseconds specified. In order to provide different filenames, you should add %04d or similar at the point in the filename where you want a segment count number to appear e.g:
Copy to Clipboard –segment 3000 -o video%04d.h264
will produce video clips of approximately 3000ms (3s) long, named video0001.h264 , video0002.h264 etc. The clips should be seamless (no frame drops between clips), but the accuracy of each clip length will depend on the intraframe period, as the segments will always start on an I-frame. They will therefore always be equal or longer to the specified period.
The most recent version of Raspivid will also allow the file name to be time-based, rather than using a segment number. For example:
Copy to Clipboard –segment 3000 -o video_%c.h264
will produce file names formatted like so: video_Fri Jul 20 16:23:48 2018.h264
There are many different formatting options available. Note than the %d and %u options are not available, as they are used for the segment number formatting, and that some combinations may produce invalid file names.
Copy to Clipboard –wrap, -wr Set the maximum value for segment number
When outputting segments, this is the maximum the segment number can reach before it’s reset to 1, giving the ability to keep recording segments, but overwriting the oldest one. So if set to 4, in the segment example above, the files produced will be video0001.h264 , video0002.h264 , video0003.h264 , and video0004.h264 . Once video0004.h264 is recorded, the count will reset to 1, and video0001.h264 will be overwritten.
Copy to Clipboard –start, -sn Set the initial segment number
When outputting segments, this is the initial segment number, giving the ability to resume a previous recording from a given segment. The default value is 1.
Copy to Clipboard –raw, -r
Specify the output file name for any raw data files requested.
Copy to Clipboard –raw-format, -rf
So you have finished reading the 라즈베리 파이 4 카메라 topic article, if you find this article useful, please share it. Thank you very much. See more: 라즈베리파이 카메라 연결, 라즈베리파이 카메라 모듈, 라즈베리파이 카메라 opencv, 라즈베리파이 카메라 스트리밍